“You need to eat something before you pass out.” My husband didn’t even look up from his laptop when he said it. I was three hours deep into a work deadline, hadn’t moved from my chair, and my stomach was making noises that sounded vaguely prehistoric. I opened the pantry door and stared at the shelves like they owed me an answer. Peanut butter. Oats. Honey. Chocolate chips. That was it. And that was the moment these Easy No-Bake Peanut Butter Protein Balls were born — not from a fancy health kick or a meal prep plan, but from pure, desperate hunger.
I rolled the first batch between my palms, sticky and sweet, and took a bite right there over the sink. Honestly? I closed my eyes. It tasted like I actually had my life together. Which I absolutely did not, but the protein balls made a convincing argument. They had that chewy, satisfying texture you want from a snack, a good hit of peanut butter flavor, and just enough sweetness to trick my brain into thinking I was eating dessert. I made them again the next day. And the day after that. By the third time, I had the measurements memorized.
There is something grounding about a recipe that asks nothing from you. No oven preheating, no complicated techniques, no fancy equipment. Just your hands, a bowl, and five minutes of your time. These protein balls have become my emergency snack, my afternoon pick-me-up, and the thing I make when I need to feel like I have at least one small victory in my day. They are not fancy. They are not complicated. But they are exactly what you need when hunger hits and you don’t have the energy to cook.
Why You’ll Love This Recipe
Let me tell you why these Easy No-Bake Peanut Butter Protein Balls have earned a permanent spot in my refrigerator. I have tested this recipe at least a dozen times — tweaking the ratios, trying different mix-ins, even accidentally making them too dry once (we don’t talk about that batch). What I landed on is the perfect balance of texture, flavor, and convenience.
- Quick & Easy: Five minutes. That is all you need. No baking, no waiting, no complicated steps. Mix, roll, eat. Done.
- Simple Ingredients: You probably have everything in your pantry right now. Peanut butter, oats, honey, chocolate chips. That is the base. No trips to specialty stores required.
- Perfect for Busy Days: Whether you need a pre-workout snack, a mid-afternoon energy boost, or something to grab on your way out the door, these protein balls deliver.
- Crowd-Pleaser: I have brought these to gatherings and watched people eat three in a row. Kids love them. Adults love them. They disappear fast.
- Unbelievably Delicious: The texture is soft and chewy, the peanut butter flavor is front and center, and the chocolate chips add little bursts of sweetness. It feels like eating cookie dough, but with actual nutritional value.
What makes this recipe different from the dozens of other protein ball recipes out there? It is the texture. I spent time getting the ratio of wet to dry ingredients just right so the balls hold together without being too sticky or too crumbly. They are sturdy enough to pack in a lunchbox but soft enough to enjoy straight from the fridge. Plus, I add a pinch of salt to balance the sweetness — a small detail that makes a big difference.
This is the kind of recipe that makes you feel good about feeding yourself. It is not about deprivation or strict meal plans. It is about having something delicious and nourishing ready when you need it. And honestly, that is a small act of self-care that goes a long way.
What Ingredients You Will Need
This recipe uses simple, wholesome ingredients that come together to create a snack that tastes indulgent but is actually good for you. Here is everything you need:
- 1 cup creamy peanut butter (use natural peanut butter for less sugar, or regular for a sweeter result; I prefer Skippy Natural for the best texture)
- 1/2 cup honey (or maple syrup for a vegan option; adds natural sweetness and helps bind the balls together)
- 1 1/2 cups old-fashioned rolled oats (do not use quick oats — they make the texture too mushy; old-fashioned oats give the perfect chewy bite)
- 1/2 cup mini chocolate chips (I use semi-sweet for balance, but dark chocolate or milk chocolate both work great)
- 1/4 cup ground flaxseed (adds fiber and omega-3s; completely optional but I love the nutritional boost)
- 1/4 cup protein powder (vanilla or unflavored works best; I recommend Optimum Nutrition Gold Standard for a clean taste)
- 1/4 teaspoon salt (enhances the peanut butter flavor and balances the sweetness)
- 1 teaspoon vanilla extract (adds warmth and depth to the flavor profile)
For substitutions, you can swap the peanut butter with almond butter or sunflower seed butter if you have allergies. Just note that sunflower seed butter can make the balls turn slightly green due to a natural reaction with baking soda — don’t worry, it is safe to eat! If you want a gluten-free option, use certified gluten-free oats. For a lower-carb version, replace the oats with unsweetened shredded coconut or crushed nuts.
I always recommend using fresh ingredients for the best flavor. Old oats can taste stale, and peanut butter that has been sitting in the pantry too long can separate and affect the texture. Trust me, fresh ingredients make a noticeable difference.
Equipment Needed
The beauty of this recipe is that you do not need much. Here is what you will need:
- Large mixing bowl (any size works, but bigger is better for mixing without making a mess)
- Spatula or wooden spoon (for mixing the ingredients together; a sturdy spatula works best)
- Measuring cups and spoons (for accurate measurements; I use standard US measuring cups)
- Baking sheet or plate (to place the rolled balls on while they set)
- Parchment paper or wax paper (optional, but prevents sticking and makes cleanup easier)
- Small cookie scoop (optional, but helps create uniform-sized balls; I use a 1-tablespoon scoop)
- Refrigerator (for chilling the balls so they hold their shape)
If you do not have a cookie scoop, you can use a regular spoon or just use your hands to portion the mixture. I have done both many times, and honestly, using your hands gives you more control over the size. Just make sure your hands are slightly damp or oiled to prevent the mixture from sticking to your fingers.
I have tried making these with a food processor to chop the oats finer, but I prefer the texture of whole oats. The chewiness is part of what makes these protein balls so satisfying. Keep it simple — no need to overcomplicate things.
Preparation Method
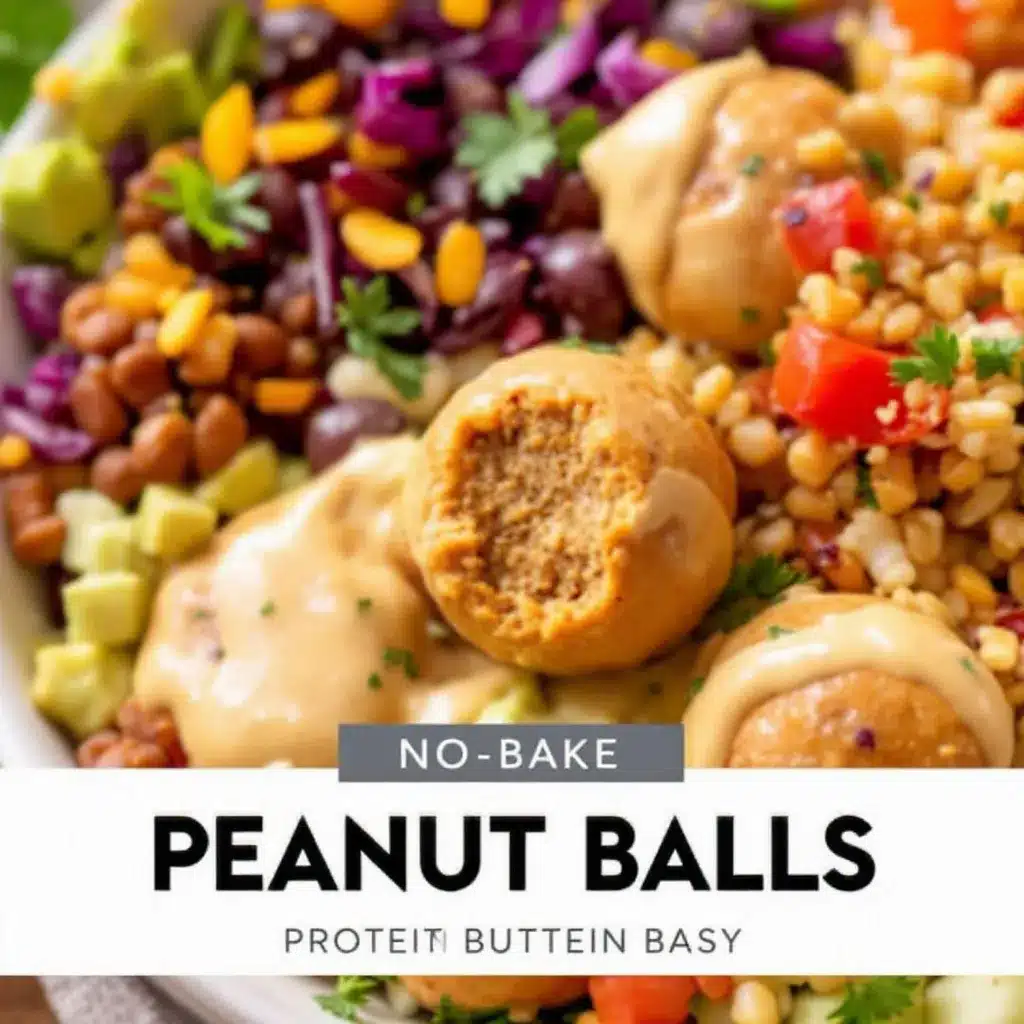
Follow these steps, and you will have a batch of perfect Easy No-Bake Peanut Butter Protein Balls in under ten minutes. I promise it is foolproof.
- Combine the wet ingredients. In a large mixing bowl, add 1 cup of creamy peanut butter, 1/2 cup of honey, and 1 teaspoon of vanilla extract. Stir them together until smooth and fully combined. The mixture should look glossy and smell amazing. If your peanut butter is stiff at room temperature, microwave it for 10-15 seconds to soften it — this makes mixing much easier.
- Add the dry ingredients. Add 1 1/2 cups of old-fashioned rolled oats, 1/4 cup of ground flaxseed, 1/4 cup of protein powder, and 1/4 teaspoon of salt to the bowl. Stir everything together with your spatula until no dry patches remain. The mixture will be thick and a little sticky. This is exactly what you want. If it looks too dry, add a tablespoon of honey or peanut butter. If it looks too wet, add a tablespoon of oats.
- Fold in the chocolate chips. Add 1/2 cup of mini chocolate chips to the mixture and fold them in gently. Make sure they are evenly distributed throughout the dough. Mini chips work better than regular-sized chips because they distribute more evenly, but regular chips work fine too.
- Chill the mixture. Cover the bowl with plastic wrap or a clean kitchen towel and place it in the refrigerator for 15-20 minutes. This step is optional but highly recommended. Chilling the mixture makes it much easier to roll into balls without it sticking to your hands. If you are in a hurry, you can skip this step, but expect slightly messier hands.
- Roll into balls. Remove the mixture from the refrigerator. Using a small cookie scoop or a spoon, portion out about 1 tablespoon of the mixture. Roll it between your palms to form a smooth ball. Place each ball on a baking sheet lined with parchment paper. Repeat until all the mixture is used. You should get about 20-24 balls depending on size.
- Chill again. Place the baking sheet with the rolled balls in the refrigerator for at least 30 minutes. This allows them to firm up and hold their shape. If you cannot wait that long, you can eat them immediately — they will just be a bit softer.
- Store and enjoy. Transfer the protein balls to an airtight container and store them in the refrigerator. They will keep for up to two weeks, though I doubt they will last that long.
A few sensory cues to watch for: the dough should feel like soft cookie dough — pliable but not wet. When you roll the balls, they should hold their shape without cracking. If they crack, add a little more honey or peanut butter. If they are too sticky to roll, chill them longer.
Cooking Tips & Techniques
I have made these Easy No-Bake Peanut Butter Protein Balls so many times that I have learned a few tricks the hard way. Let me save you from my mistakes.
Use room temperature peanut butter. Cold peanut butter is hard to mix and creates uneven texture. Let it sit out for 15 minutes before starting, or give it a quick microwave blast. I learned this after struggling through a batch where the peanut butter refused to blend with the honey — it was a sticky disaster.
Do not overmix. Once the dry ingredients are incorporated, stop mixing. Overworking the dough can make the balls dense and tough. You want them tender and chewy, not like hockey pucks.
Wet your hands slightly. If the mixture sticks to your palms while rolling, dampen your hands with a little water. This creates a barrier that prevents sticking without adding extra oil or flour. It is a game-changer.
Chill between steps. I know it adds time, but chilling the mixture before rolling and again after rolling makes a huge difference. The balls hold their shape better and have a nicer texture. If you skip the chill, they will be softer and more prone to falling apart.
Taste as you go. Before you roll all the balls, taste a small piece of the mixture. Adjust the sweetness, salt, or peanut butter flavor to your preference. Everyone’s taste buds are different, and this is your snack — make it exactly how you like it.
Double the batch. Seriously. These disappear fast. I always make a double batch so I have some for the week and some to freeze for later. They freeze beautifully and thaw in about 10 minutes at room temperature.
One time, I forgot to add the salt and the balls tasted flat and one-dimensional. The salt is not optional — it brings out the peanut butter flavor and balances the sweetness. Do not skip it.
Variations & Adaptations
One of the best things about this recipe is how customizable it is. Here are some variations I have tried and loved:
Chocolate Peanut Butter: Add 2 tablespoons of cocoa powder to the dry ingredients for a chocolate version. It tastes like a Reese’s peanut butter cup in ball form. I made these for a party and they disappeared in minutes.
Vegan Option: Replace the honey with maple syrup or agave nectar. Use dairy-free chocolate chips. Everything else is already plant-based. The texture will be slightly different — maple syrup is thinner than honey — but the flavor is still fantastic.
Nut-Free Version: Substitute the peanut butter with sunflower seed butter or WowButter (a soy-based alternative). These work well, though sunflower seed butter can react with baking soda if you add any, turning the balls green. It is harmless, but if you want to avoid it, skip the baking soda.
Protein Boost: Add an extra scoop of protein powder and reduce the oats by 1/4 cup. This makes the balls higher in protein but also slightly drier. Add an extra tablespoon of honey to compensate.
Seasonal Twist: In the fall, add 1 teaspoon of pumpkin pie spice and swap the chocolate chips for dried cranberries. In the summer, add 1/4 cup of finely chopped dried mango and 2 tablespoons of shredded coconut for a tropical vibe.
Crunchy Version: Use crunchy peanut butter instead of creamy and add 1/4 cup of chopped peanuts. The extra crunch is satisfying and adds a nice textural contrast.
My personal favorite variation is the chocolate peanut butter version with a sprinkle of sea salt on top. It is dangerously good. I have to hide them from myself.
Serving & Storage Suggestions
These Easy No-Bake Peanut Butter Protein Balls are incredibly versatile when it comes to serving. Here is how I like to enjoy them:
Serving Temperature: I prefer them straight from the refrigerator — they are firm, chewy, and satisfying. At room temperature, they are softer and almost melt-in-your-mouth. Both are delicious, just different textures. Try both and see which you prefer.
Presentation Ideas: Arrange them on a small platter for a party or pack them in a mason jar for a cute gift. I have given these as hostess gifts tied with a ribbon, and they were a hit. For a snack board, pair them with fresh fruit, cheese, and nuts.
Complementary Dishes: These protein balls pair beautifully with a cup of coffee or tea. They also work well alongside a smoothie for a complete breakfast. If you are planning a party menu, they are a great addition to a brunch spread alongside dishes like fluffy mini quiches or even crispy bacon-wrapped dates for a sweet and savory balance.
Storage Instructions: Store the protein balls in an airtight container in the refrigerator for up to two weeks. They also freeze beautifully for up to three months. To freeze, place them in a single layer on a baking sheet, freeze until solid, then transfer to a freezer-safe bag or container. Thaw in the refrigerator overnight or at room temperature for 10-15 minutes.
Flavor Development: The flavors actually deepen and meld together after a day or two in the refrigerator. I think they taste even better on day two. The oats soften slightly, the peanut butter flavor becomes more pronounced, and the chocolate chips set perfectly.
One note: if you take them on the go, they will soften at room temperature. Pack them in a cooler if you are traveling in warm weather. I learned this the hard way during a summer picnic when my protein balls turned into a sticky mess.
Nutritional Information & Benefits
Here is the approximate nutritional breakdown for one protein ball (based on 24 balls):
| Nutrient | Amount per Ball |
|---|---|
| Calories | 120 |
| Protein | 5g |
| Carbohydrates | 14g |
| Fiber | 2g |
| Sugar | 8g |
| Fat | 6g |
| Saturated Fat | 1.5g |
| Sodium | 85mg |
These protein balls are packed with nutritional benefits. Peanut butter provides healthy fats and protein to keep you full and satisfied. Oats offer complex carbohydrates for sustained energy, plus fiber for digestive health. Flaxseed adds omega-3 fatty acids, which support heart health and reduce inflammation. The protein powder gives an extra boost, making this a great post-workout snack or meal replacement option.
This recipe is naturally vegetarian and can easily be made vegan, gluten-free, or nut-free with simple substitutions. It is also free from refined sugar if you use natural peanut butter and honey. The only potential allergen is peanuts, so be mindful if serving to someone with nut allergies.
From a wellness perspective, I love that these protein balls provide a balanced combination of protein, healthy fats, and carbohydrates. They are the kind of snack that actually fuels your body instead of just filling your stomach. When I eat one, I feel energized and satisfied, not sluggish or hungry an hour later.
Conclusion
These Easy No-Bake Peanut Butter Protein Balls have become a staple in my kitchen for a reason. They are quick, simple, and genuinely delicious. No fancy techniques, no obscure ingredients, no hours of preparation. Just five minutes and a handful of pantry staples, and you have a snack that tastes like a treat but fuels your body like a meal.
I encourage you to make this recipe your own. Add your favorite mix-ins, adjust the sweetness to your taste, experiment with different nut butters. That is the beauty of a simple recipe — it is a canvas for your creativity. And honestly, even if you follow the recipe exactly as written, you will end up with something wonderful.
What I love most about these protein balls is how they make me feel. Prepared. Nourished. Like I have my act together, even when I absolutely do not. There is something deeply satisfying about opening the fridge and seeing a container of homemade snacks waiting for you. It is a small victory, but it matters.
I would love to hear how yours turn out. Leave a comment below and let me know what variations you tried, or tag me in your photos. Happy rolling!
Frequently Asked Questions
Can I use quick oats instead of rolled oats?
You can, but the texture will be different. Quick oats are more finely ground and will result in a softer, almost mushy texture. Rolled oats give the protein balls a chewier, more satisfying bite. If you only have quick oats, I recommend using slightly less liquid to compensate.
How long do these protein balls last?
Stored in an airtight container in the refrigerator, they will stay fresh for up to two weeks. You can also freeze them for up to three months. Just thaw them in the refrigerator overnight or at room temperature for 10-15 minutes before eating.
Can I make these without protein powder?
Absolutely. The protein powder adds extra protein and helps bind the balls together, but you can omit it entirely. If you skip the protein powder, add an extra 1/4 cup of oats to maintain the right texture. The nutritional profile will be slightly different, but they will still taste great.
Why are my protein balls too dry?
This usually happens if the peanut butter is too thick or if you added too many dry ingredients. To fix it, add a tablespoon of honey or peanut butter and mix again. If the mixture still seems dry, add another tablespoon of liquid until it reaches a soft, pliable consistency.
Can I make these nut-free?
Yes! Substitute the peanut butter with sunflower seed butter, WowButter, or another nut-free alternative. Just note that sunflower seed butter can cause the balls to turn slightly green due to a natural chemical reaction — it is completely safe to eat. For a completely nut-free option, also ensure your oats are certified gluten-free and your chocolate chips are free from cross-contamination.
Pin This Recipe!
Easy No-Bake Peanut Butter Protein Balls: 5-Minute Recipe

These Easy No-Bake Peanut Butter Protein Balls are a quick, simple, and delicious snack made with pantry staples. Ready in just five minutes, they are perfect for busy days, pre-workout fuel, or a healthy treat.
- Prep Time: 5 minutes
- Cook Time: 0 minutes
- Total Time: 5 minutes
- Yield: 20-24 balls 1x
- Category: Snack
- Cuisine: American
Ingredients
- 1 cup creamy peanut butter
- 1/2 cup honey
- 1 1/2 cups old-fashioned rolled oats
- 1/2 cup mini chocolate chips
- 1/4 cup ground flaxseed
- 1/4 cup protein powder (vanilla or unflavored)
- 1/4 teaspoon salt
- 1 teaspoon vanilla extract
Instructions
- Combine the wet ingredients. In a large mixing bowl, add 1 cup of creamy peanut butter, 1/2 cup of honey, and 1 teaspoon of vanilla extract. Stir them together until smooth and fully combined.
- Add the dry ingredients. Add 1 1/2 cups of old-fashioned rolled oats, 1/4 cup of ground flaxseed, 1/4 cup of protein powder, and 1/4 teaspoon of salt to the bowl. Stir everything together until no dry patches remain.
- Fold in the chocolate chips. Add 1/2 cup of mini chocolate chips to the mixture and fold them in gently until evenly distributed.
- Chill the mixture. Cover the bowl and place it in the refrigerator for 15-20 minutes.
- Roll into balls. Using a small cookie scoop or spoon, portion out about 1 tablespoon of the mixture and roll it between your palms to form a smooth ball. Place each ball on a baking sheet lined with parchment paper.
- Chill again. Place the baking sheet with the rolled balls in the refrigerator for at least 30 minutes to firm up.
- Store and enjoy. Transfer the protein balls to an airtight container and store them in the refrigerator for up to two weeks.
Notes
For best results, use room temperature peanut butter. If the mixture is too sticky, chill longer before rolling. If too dry, add a tablespoon of honey or peanut butter. These protein balls can be frozen for up to three months.
Nutrition
- Serving Size: 1 ball
- Calories: 120
- Sugar: 8
- Sodium: 85
- Fat: 6
- Saturated Fat: 1.5
- Carbohydrates: 14
- Fiber: 2
- Protein: 5
Keywords: no-bake protein balls, peanut butter protein balls, healthy snack, easy protein balls, 5-minute recipe


