Standing in my kitchen with a can of pumpkin puree in one hand and a box of yellow cake mix in the other, I realized I had exactly zero plans for dessert. It was early November, the house smelled like cinnamon from the candle I’d lit earlier, and I needed something that felt like fall without requiring a trip to the store. I’d seen those dump cake recipes floating around the internet for years, honestly, and always thought they seemed too good to be true. But with twenty minutes before dinner was done and a table full of hungry people expecting something sweet, I figured I had nothing to lose.
So I dumped. I didn’t cream butter or sift flour or do any of the things my grandmother would have insisted on. I just opened cans, sprinkled cake mix, and poured melted butter over the top like some kind of culinary rebel. The whole thing felt wrong, but also kind of freeing, you know? And when I pulled that pan out of the oven, bubbling and golden and smelling like a pumpkin spice candle had come to life, I knew I’d stumbled onto something special. This easy pumpkin dump cake with yellow cake mix has become my go-to fall dessert, and it’s the kind of recipe that makes people think you spent hours in the kitchen when you really just opened a few packages and let the oven do the work.
Why You’ll Love This Recipe
Let me tell you why this recipe has earned a permanent spot in my fall rotation. I’ve tested this easy pumpkin dump cake with yellow cake mix at least a dozen times, tweaking the butter amount, trying different mix-ins, and even sneaking it into holiday gatherings where nobody guessed it came together in under ten minutes of prep.
- Incredibly Easy : We’re talking dump, spread, pour, and bake. That’s it. No mixer required, no complicated techniques, no stressing over whether your batter is the right consistency.
- Simple Ingredients : You probably have most of these in your pantry right now. Canned pumpkin, cake mix, butter, eggs, and a few spices. Nothing fancy, nothing hard to find.
- Perfect for Fall Gatherings : This dessert screams autumn. It’s warm, cozy, and pairs beautifully with a cup of coffee or a scoop of vanilla ice cream. It’s also fantastic for Thanksgiving when you need one more dessert that doesn’t require rolling out pie crust.
- Crowd-Pleaser : I’ve served this at potlucks, family dinners, and casual get-togethers, and it disappears every single time. Kids love it, adults love it, and people always ask for the recipe.
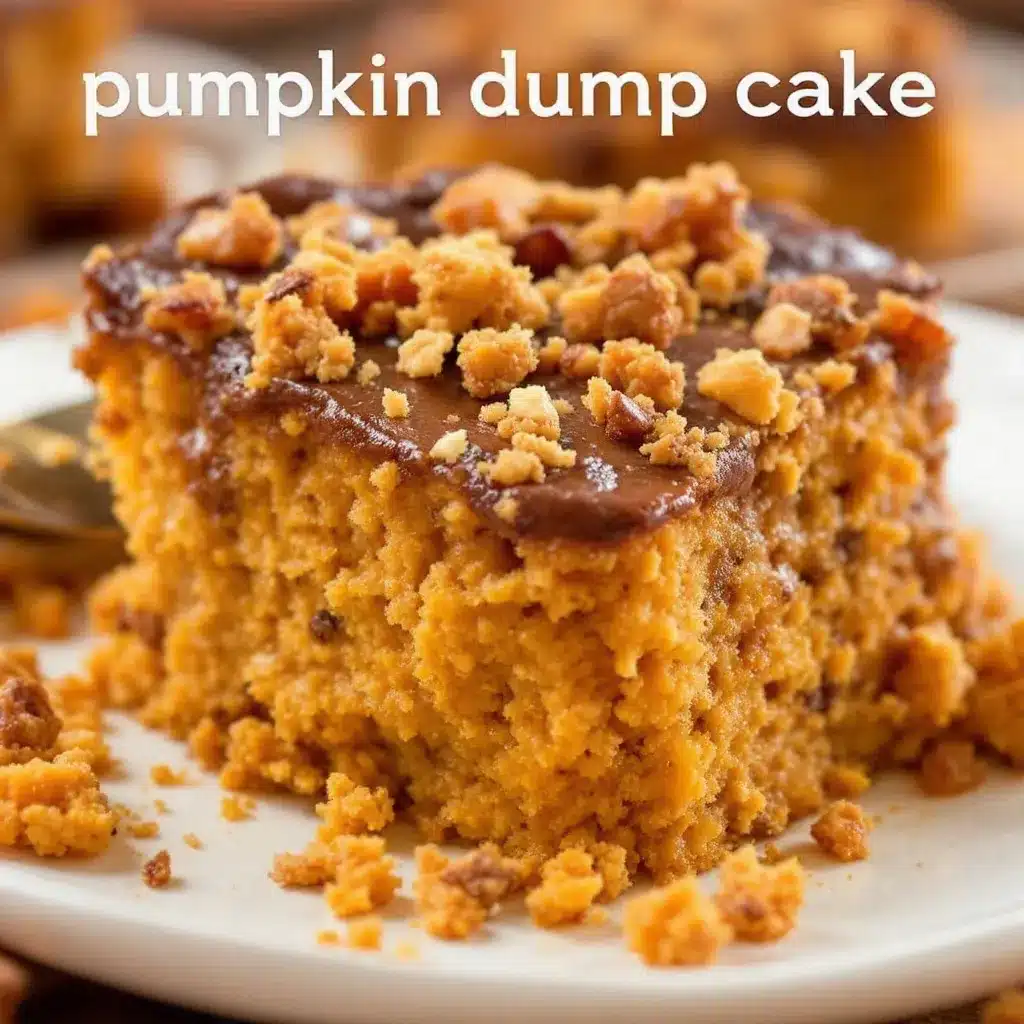
- Unbelievably Delicious : The texture is what gets me every time. You get that creamy, spiced pumpkin layer on the bottom, then a buttery, slightly crisp cake topping that’s part crumble, part cake, all delicious.
What makes this version different from the rest is the technique I’ve developed over countless batches. I use cold butter grated directly over the cake mix instead of melted butter poured on top. It creates this incredible texture where some of the cake mix stays dry and crumbly while other parts absorb the butter and turn into tender cake pockets. It’s not just another dump cake—it’s the best version I’ve ever made, and I’ve made a lot of them.
This easy pumpkin dump cake with yellow cake mix is the kind of dessert that makes you close your eyes after the first bite. It’s comfort food reimagined—simpler, faster, but with the same soul-soothing satisfaction you get from a homemade pumpkin pie. Perfect for impressing guests without stress, or turning a regular Tuesday night into something special.
What Ingredients You Will Need
This recipe uses simple, wholesome ingredients to deliver bold fall flavor and satisfying texture without the fuss. Most of these are pantry staples, especially if you keep basic baking supplies on hand during the autumn months.
For the Pumpkin Layer
- 1 can (15 ounces) pumpkin puree (not pumpkin pie filling—make sure you grab pure pumpkin)
- 1 cup granulated sugar
- 3 large eggs, room temperature
- 1 tablespoon pumpkin pie spice (store-bought or homemade—I prefer using my own blend)
- 1 teaspoon vanilla extract
- 1/2 cup evaporated milk (adds richness without making the layer too thin)
For the Cake Topping
- 1 box (15.25 ounces) yellow cake mix (I recommend Duncan Hines or Betty Crocker for best texture)
- 1 cup unsalted butter, cold (this is the secret to that perfect crumbly top)
- 1 cup chopped pecans or walnuts (optional, but highly recommended for crunch)
Let me talk about a few of these ingredients because the details matter here. For the pumpkin puree, I always use Libby’s because it’s consistently thick and not watery. If you use a store brand, just make sure it’s 100% pumpkin and not pumpkin pie filling, which already has sugar and spices added. The evaporated milk is important—don’t substitute regular milk or cream here. Evaporated milk has a slightly caramelized flavor and thicker consistency that works perfectly with the pumpkin.
For the cake mix, yellow cake mix is my preference because it has a mild vanilla flavor that doesn’t compete with the pumpkin spices. You could use white cake mix in a pinch, but yellow gives you that slightly buttery flavor that complements the topping. If you’re feeling adventurous, spice cake mix works beautifully here and adds even more warm flavor.
The butter situation is crucial. You want it cold, straight from the refrigerator. I grate it on a box grater, which might sound fussy, but it distributes evenly over the cake mix and creates that perfect crumbly texture. If grating butter sounds like too much work, you can slice it into very thin pats and arrange them over the top, but grating really does give the best results.
Equipment Needed
You don’t need much for this recipe, which is part of its charm. Here’s what you’ll need:
- 9×13-inch baking dish (glass or metal both work fine)
- Large mixing bowl
- Whisk
- Box grater (for grating the cold butter—this is my preferred method)
- Measuring cups and spoons
- Can opener
- Spatula or wooden spoon
If you don’t have a box grater, you can use a pastry cutter to cut cold butter into the cake mix, or simply slice the butter into very thin pieces and scatter them evenly. I’ve done it all three ways, and grating is definitely the easiest and most consistent. A food processor with a grating disc works too, but honestly, it’s more dishes to wash, and this recipe is supposed to be easy.
I recommend using a glass baking dish because you can see the pumpkin layer bubbling up around the edges as it bakes, which helps you know when it’s done. But metal works perfectly too—just keep an eye on the baking time since metal pans can cook slightly faster.
Preparation Method
Preheat your oven to 350°F (175°C). Grease your 9×13-inch baking dish with butter or non-stick spray. I use butter because I like the flavor it adds to the edges, but spray works fine too.
- Make the pumpkin layer : In your large mixing bowl, whisk together the pumpkin puree, sugar, eggs, pumpkin pie spice, vanilla extract, and evaporated milk. Whisk until everything is smooth and well combined. The mixture should be thick but pourable, like a very loose pudding. Don’t overmix—just get it smooth and stop.
- Pour into the baking dish : Pour the pumpkin mixture into your prepared baking dish and spread it evenly with a spatula. Make sure it reaches all the corners and the surface is level. This layer will be the base of your dump cake, and you want it to be even so the cake mix distributes uniformly on top.
- Sprinkle the cake mix : Open your box of yellow cake mix and sprinkle it evenly over the pumpkin layer. Don’t stir it in—just dump it on top and spread it with your fingers or a spoon to cover the surface as evenly as possible. This is the “dump” part of the recipe, and it’s intentionally messy. Some of the pumpkin will peek through, and that’s fine.
- Add the nuts (optional) : If you’re using chopped pecans or walnuts, sprinkle them evenly over the cake mix layer. They’ll toast as the cake bakes and add wonderful crunch and nutty flavor.
- Add the butter : Here’s where my technique differs from most recipes. Take your cold butter and grate it directly over the cake mix using the large holes of a box grater. Work quickly so the butter doesn’t soften too much from the heat of your hands. Try to distribute the grated butter as evenly as possible across the entire surface. If you’re using sliced butter, arrange the thin pats evenly over the top, leaving about 1/2 inch between each piece. The butter will melt and create pockets of crispy, buttery cake topping.
- Bake : Place the dish in your preheated oven and bake for 45-50 minutes. The top should be golden brown and the edges should be bubbling with pumpkin filling. You’ll know it’s done when a toothpick inserted into the cake topping comes out clean (it won’t go through the pumpkin layer, so just test the top). The pumpkin layer will still be soft and custard-like, which is exactly what you want.
- Cool slightly : Let the dump cake cool on a wire rack for at least 15-20 minutes before serving. This allows the pumpkin layer to set up a bit so it’s not too runny. I know it’s tempting to dig in right away, but the texture is much better after a short rest.
One thing I learned the hard way—don’t overbake this. The first time I made it, I left it in the oven an extra ten minutes because I wanted the top extra crispy, and the pumpkin layer dried out and cracked. You want the center to still have a slight jiggle when you shake the pan. It will continue to set as it cools.
Cooking Tips & Techniques
After making this easy pumpkin dump cake with yellow cake mix more times than I can count, I’ve picked up a few tricks that make a real difference.
The butter hack : I mentioned grating cold butter, but let me tell you why it matters. When you pour melted butter over the cake mix, it soaks in everywhere and creates a more uniform, cake-like texture. When you grate cold butter, some pieces melt quickly and create tender pockets, while others take longer to melt, leaving some of the cake mix dry and crumbly. That contrast in textures is what makes this version so good. I learned this trick from a friend who makes amazing cobblers, and it completely changed my dump cake game.
Don’t skip the cooling time : I know, I know. The smell coming out of your kitchen is intoxicating, and you want to scoop into that warm, buttery goodness immediately. But trust me on this one. Letting it rest for at least 20 minutes allows the pumpkin layer to set into a firm, custard-like consistency. If you scoop it too soon, you’ll end up with soupy pumpkin running all over your plate. It’s still delicious, but it’s not as pretty.
Watch your oven : Every oven runs differently, so start checking your dump cake at the 40-minute mark. If the top is getting too dark but the center still looks underdone, tent the dish loosely with aluminum foil and continue baking. I’ve had ovens that took a full 55 minutes and others that were done at 42. Get to know your oven and adjust accordingly.
The toothpick test : Insert a toothpick into the cake topping, not the pumpkin layer. The topping should be firm and the toothpick should come out clean or with a few dry crumbs. If it comes out wet with batter, it needs more time. The pumpkin layer underneath will still be soft, and that’s exactly what you want.
Variations & Adaptations
One of the best things about this easy pumpkin dump cake with yellow cake mix is how adaptable it is. Here are some variations I’ve tried and loved.
Spice cake version : Swap the yellow cake mix for a box of spice cake mix. This adds even more warm spice flavor and pairs beautifully with the pumpkin. You might want to reduce the pumpkin pie spice in the pumpkin layer to 2 teaspoons since the cake mix already has spices in it. This version is my go-to for Thanksgiving because it tastes like you put way more effort into it than you actually did.
Gluten-free option : Use a gluten-free yellow cake mix. I’ve tested this with King Arthur’s gluten-free yellow cake mix and it works perfectly. Just make sure your pumpkin puree and other ingredients are certified gluten-free if that’s a concern. Nobody will be able to tell the difference, honestly.
Dairy-free adaptation : Substitute the butter with a high-quality vegan butter stick (I like Miyoko’s or Earth Balance). Use coconut cream or full-fat oat milk in place of the evaporated milk. The texture will be slightly different, but it’s still incredibly good. I made this for a friend with dairy allergies and she asked for the recipe before I even told her it was dairy-free.
Chocolate chip pumpkin dump cake : Sprinkle 1/2 cup of semi-sweet chocolate chips over the cake mix before adding the butter. The chocolate melts into pockets of gooey goodness that pair surprisingly well with the pumpkin and spices. This was an accidental discovery when I was making cookies at the same time and had leftover chocolate chips on the counter.
Pumpkin cheesecake dump cake : Before adding the cake mix, drop spoonfuls of cream cheese mixture (8 ounces softened cream cheese, 1/4 cup sugar, 1 egg, 1 teaspoon vanilla) over the pumpkin layer. Swirl it gently with a knife, then proceed with the cake mix and butter. This creates ribbons of creamy cheesecake throughout the pumpkin layer, and it’s absolutely decadent.
Serving & Storage Suggestions
This dump cake is best served warm, about 20 minutes after it comes out of the oven. The texture is at its peak—the pumpkin layer is soft and custard-like, the topping is buttery and slightly crisp, and everything is perfectly warm.
Serving ideas : Scoop into bowls and top with a generous scoop of vanilla ice cream. The cold, creamy ice cream melting into the warm, spiced pumpkin is pure magic. A dollop of whipped cream works too, or even a drizzle of caramel sauce if you’re feeling extra indulgent. For a less sweet option, serve with a dollop of Greek yogurt or crème fraîche.
What to serve with it : This dessert is rich enough to stand on its own, but it pairs beautifully with a cup of hot coffee or spiced apple cider. If you’re serving it at a fall gathering, it goes great alongside other seasonal treats like creamy cheesecake for a dessert spread that covers all the bases.
Storage : Cover the baking dish tightly with plastic wrap or aluminum foil and store in the refrigerator for up to 5 days. The topping will soften as it sits, but the flavors actually get better after a day or two. I’ve been known to eat this cold straight from the fridge, and it’s surprisingly good that way too.
Reheating : The best way to reheat individual servings is in the microwave for 20-30 seconds. For a larger portion, reheat in a 350°F oven for 10-15 minutes, covered with foil to prevent the top from burning. You can also reheat in an air fryer at 325°F for 3-4 minutes for a slightly crisper topping.
Freezing : This dump cake freezes beautifully. Let it cool completely, then wrap the entire dish tightly in plastic wrap, followed by a layer of aluminum foil. Freeze for up to 3 months. Thaw overnight in the refrigerator and reheat as directed above. I often make two at a time—one for now and one for later.
Nutritional Information & Benefits
Here’s the approximate nutritional breakdown for one serving (based on 12 servings):
| Nutrient | Amount per Serving |
|---|---|
| Calories | 385 |
| Total Fat | 22g |
| Saturated Fat | 12g |
| Cholesterol | 85mg |
| Sodium | 420mg |
| Total Carbohydrates | 45g |
| Dietary Fiber | 2g |
| Sugars | 28g |
| Protein | 5g |
| Vitamin A | 95% DV |
| Vitamin C | 4% DV |
| Calcium | 8% DV |
| Iron | 10% DV |
Pumpkin is packed with vitamin A, which is great for eye health and immune function. It’s also a good source of fiber, which helps keep you full and supports digestive health. The pecans add healthy fats and a little protein, making this dessert slightly more balanced than your average cake. Is it health food? No. But it’s made with real ingredients, and there’s something to be said for that.
This recipe contains gluten, dairy, eggs, and tree nuts (if using pecans or walnuts). For allergen-friendly versions, check out the variations section above.
Conclusion
This easy pumpkin dump cake with yellow cake mix has become my secret weapon for fall entertaining. It’s the dessert I bring to potlucks when I want to impress without spending hours in the kitchen. It’s the dessert I make on random Tuesday nights when I need something warm and comforting. And it’s the dessert that always, without fail, gets people asking for the recipe.
The beauty of this recipe is that it’s forgiving enough for beginners but good enough to serve at holiday dinners. You can dress it up with ice cream and caramel sauce, or keep it simple with just a fork and a plate. It works for Thanksgiving, for Halloween parties, for cozy nights in when the weather turns cold.
I’d love to hear how this turns out for you. Did you try any of the variations? Did you discover your own twist? Drop a comment below and let me know—I read every single one, and I love hearing about your kitchen adventures. And if you’re looking for more easy dessert inspiration, check out my full collection of recipes for more crowd-pleasing treats. Happy baking, friends!
Frequently Asked Questions
Can I use pumpkin pie filling instead of pumpkin puree?
I wouldn’t recommend it. Pumpkin pie filling already has sugar and spices added, which will throw off the sweetness and spice balance in this recipe. Stick with 100% pure pumpkin puree for the best results. If you only have pumpkin pie filling, reduce the sugar to 1/2 cup and skip the pumpkin pie spice, but honestly, the texture won’t be quite right.
Do I have to use evaporated milk?
Evaporated milk gives the pumpkin layer a rich, creamy texture that regular milk just can’t match. If you’re in a pinch, you can use half-and-half or full-fat coconut milk, but the texture will be slightly less luxurious. Don’t use sweetened condensed milk—it’s much sweeter and thicker, and it will make the pumpkin layer too dense and sugary.
Can I make this in advance?
Absolutely! You can assemble the entire dump cake up to 24 hours ahead of time, cover it, and refrigerate it. When you’re ready to bake, add about 10 minutes to the baking time since you’re starting from cold. You can also bake it fully and reheat it before serving—the flavors actually get better after a day or two in the fridge.
Why is my dump cake soupy in the middle?
This usually happens for one of two reasons: either it wasn’t baked long enough, or it wasn’t cooled long enough before serving. The pumpkin layer will be slightly jiggly when it comes out of the oven, but it should set up as it cools. Give it at least 20 minutes of cooling time before you dig in. If it’s still soupy after cooling, it probably needed another 5-10 minutes in the oven.
Can I use a different flavor of cake mix?
Yes! Yellow cake mix is my favorite, but spice cake mix is a close second. White cake mix works too, and carrot cake mix is surprisingly good. I wouldn’t recommend chocolate cake mix—the flavors don’t really complement pumpkin in my opinion. If you’re feeling adventurous, try butter pecan cake mix for a nutty twist that pairs beautifully with the pumpkin and spices.
Pin This Recipe!
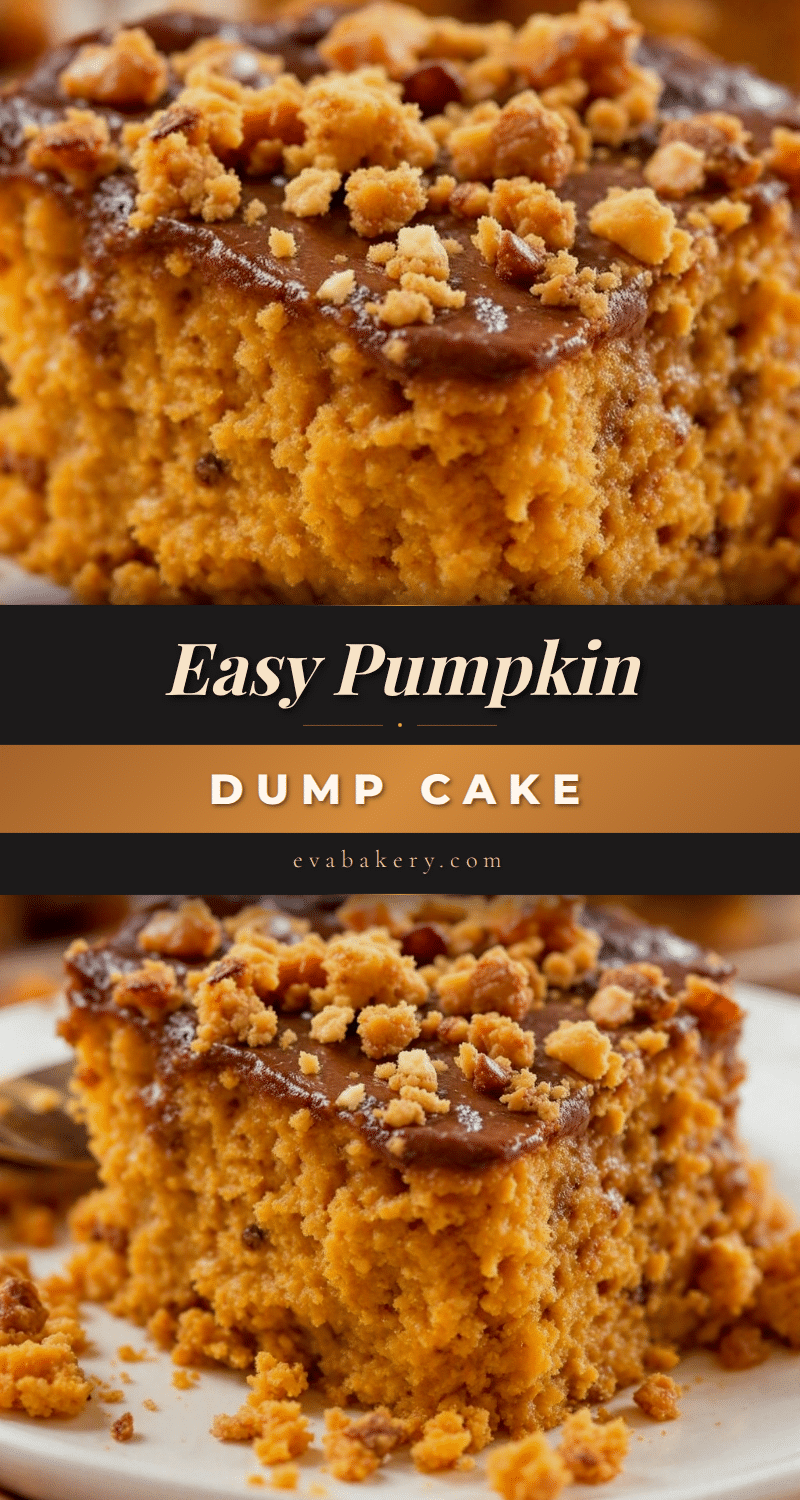
Easy Pumpkin Dump Cake with Yellow Cake Mix Recipe
This easy pumpkin dump cake with yellow cake mix is the perfect fall dessert that comes together in minutes. With a creamy spiced pumpkin layer and a buttery, crumbly cake topping, it’s a crowd-pleaser that tastes like you spent hours in the kitchen.
- Prep Time: 10 minutes
- Cook Time: 45 minutes
- Total Time: 55 minutes
- Yield: 12 servings 1x
- Category: Dessert
- Cuisine: American
Ingredients
- 1 can (15 ounces) pumpkin puree (not pumpkin pie filling)
- 1 cup granulated sugar
- 3 large eggs, room temperature
- 1 tablespoon pumpkin pie spice
- 1 teaspoon vanilla extract
- 1/2 cup evaporated milk
- 1 box (15.25 ounces) yellow cake mix
- 1 cup unsalted butter, cold
- 1 cup chopped pecans or walnuts (optional)
Instructions
- Preheat your oven to 350°F (175°C). Grease a 9×13-inch baking dish with butter or non-stick spray.
- Make the pumpkin layer: In a large mixing bowl, whisk together the pumpkin puree, sugar, eggs, pumpkin pie spice, vanilla extract, and evaporated milk until smooth and well combined.
- Pour the pumpkin mixture into the prepared baking dish and spread it evenly with a spatula.
- Sprinkle the yellow cake mix evenly over the pumpkin layer. Do not stir it in.
- If using nuts, sprinkle them evenly over the cake mix layer.
- Grate the cold butter directly over the cake mix using the large holes of a box grater, distributing it as evenly as possible. Alternatively, slice the butter into thin pats and arrange them evenly over the top.
- Bake for 45-50 minutes, until the top is golden brown and the edges are bubbling. A toothpick inserted into the cake topping should come out clean.
- Let the dump cake cool on a wire rack for at least 15-20 minutes before serving.
Notes
For best texture, grate cold butter directly over the cake mix instead of using melted butter. Let the cake cool for at least 20 minutes before serving to allow the pumpkin layer to set. Store covered in the refrigerator for up to 5 days. Reheat individual servings in the microwave for 20-30 seconds.
Nutrition
- Serving Size: 1 serving
- Calories: 385
- Sugar: 28
- Sodium: 420
- Fat: 22
- Saturated Fat: 12
- Carbohydrates: 45
- Fiber: 2
- Protein: 5
Keywords: pumpkin dump cake, easy pumpkin dessert, fall dessert, yellow cake mix recipe, pumpkin cake, dump cake


