For a while, I just accepted that festive treat tables wouldn’t have a snack that was both playful and patriotic without feeling over the top or complicated. I mean, cereals and marshmallows have been around forever, but when it came to making red, white, and blue Rice Krispie treats that actually looked vibrant and tasted fun, I didn’t see anything that quite hit the mark. It felt like those classic treats either missed the celebratory spirit or ended up too sticky and dull in color—like the excitement was lost somewhere between the melting marshmallows and the cereal crunch.
One afternoon, while rearranging some old family recipes, I found myself wishing for a simple, colorful dessert that could turn every Fourth of July picnic or summer barbecue into something a bit more memorable. Not just another patriotic cookie or cake, but something with that nostalgic snap and chew that everyone loved, dressed up in the best colors of the season. It was clear that the recipe I wanted didn’t exist yet—or at least, not in the way I imagined.
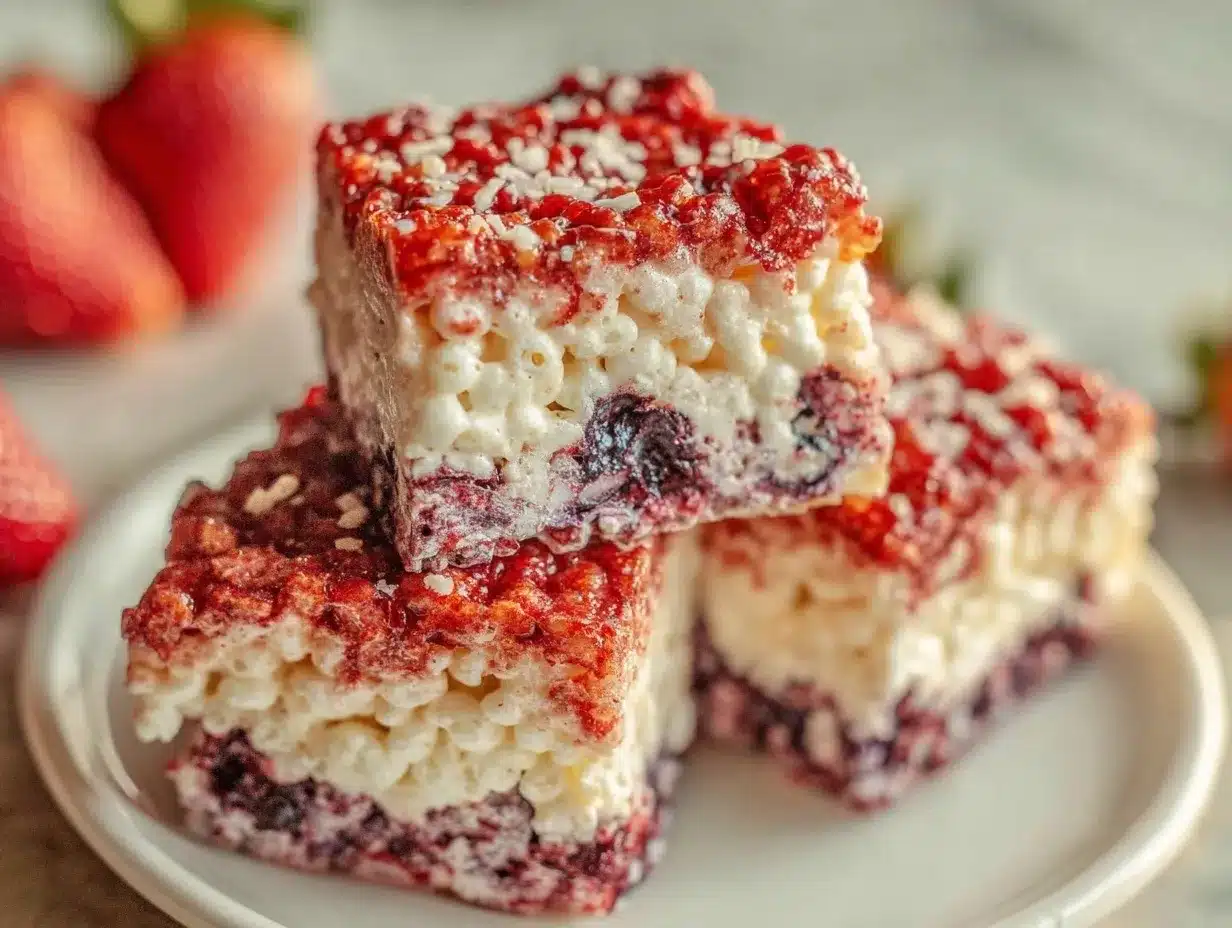
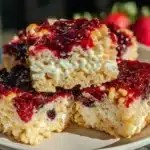
So, I started experimenting quietly, testing batches with different ways to add those bright pops of red and blue alongside the classic white, without losing the classic Rice Krispie texture. The process wasn’t flashy or fast, but each attempt edged closer to something just right—vibrant, flavorful, and easy enough to whip up without fuss. Now, whenever I serve these Festive Flavorful Red White and Blue Rice Krispie Treats, there’s this subtle joy that they bring to the table, a little spark of summer celebration that’s fun without being overwhelming. Honestly, that’s why this recipe stuck with me: because it’s the kind of simple treat that feels like a quiet nod to good times and good company.
Why You’ll Love This Recipe
I’ve made plenty of Rice Krispie treats over the years, but this version is special for several reasons that make it stand out, especially for festive occasions like the Fourth of July:
- Quick & Easy: You can get these treats ready in about 20 minutes, which is perfect when you need a last-minute dessert for a picnic or party.
- Simple Ingredients: No fancy or hard-to-find items here—just your classic marshmallows, cereal, butter, and a few food colorings that you probably already have or can grab easily.
- Perfect for Summer Celebrations: They bring a bright, patriotic look that fits right in with fireworks and sunshine, and kids love the fun colors.
- Crowd-Pleaser: Every time I’ve brought these to gatherings, both kids and adults ask for seconds, which is always a good sign!
- Unbelievably Delicious: The texture is just right—crispy but chewy, with the right balance of buttery marshmallow sweetness and a subtle hint of vanilla that ties it all together.
This isn’t just another Rice Krispie treat recipe with food dye slapped on. I’ve tweaked the mixing technique to keep the colors vibrant and separate, so each bite feels playful and festive without the colors bleeding into each other. Plus, I’ve added a touch of vanilla extract to give the marshmallow mixture a bit more depth, which really makes a difference after tasting so many plain versions over the years.
Whether you’re looking to impress guests at a backyard barbecue or just want a fun, nostalgic snack to celebrate with family, these treats hit that sweet spot. They aren’t flashy, but they’re the kind of dessert that makes you smile quietly when no one’s looking.
What Ingredients You Will Need
This recipe uses straightforward, wholesome ingredients that deliver bold flavor and that classic Rice Krispie treat texture without fuss. Most are pantry staples, making it easy to pull together whenever the mood strikes.
- Unsalted butter (about 6 tablespoons / 85 grams) – adds richness and helps melt the marshmallows evenly
- Mini marshmallows (10 ounces / 280 grams) – for that gooey, chewy texture. I prefer a trusted brand like Jet-Puffed for consistent melting
- Rice Krispies cereal (6 cups / 150 grams) – the star of the show, providing that iconic crunch
- Vanilla extract (1 teaspoon) – a simple addition that brings a subtle warmth to the treat’s flavor profile
- Red and blue food coloring – gel colors work best here because they give vibrant hues without thinning the marshmallow mixture
- Powdered sugar (optional, 1 tablespoon) – this helps keep the mixture from sticking too much when shaping
You can swap the Rice Krispies for a gluten-free crispy rice cereal if needed, making this treat accessible for gluten-sensitive folks. For a dairy-free version, use vegan butter and marshmallows (brands like Dandies work well). If fresh, seasonal berries are around, you might consider serving them alongside for an extra burst of natural red and blue flavor, but I find the food coloring method keeps the colors sharp and festive.
Equipment Needed
- Large saucepan – for melting butter and marshmallows smoothly; a heavy-bottomed pan works best to avoid burning
- Mixing bowls – at least two, to separate the colored marshmallow mixtures
- Silicone spatula – essential for scraping every last bit of sticky goodness without losing it to the sides of the pan
- Baking pan (9×13 inches / 23×33 cm) – for shaping the treats
- Parchment paper or non-stick spray – to line the pan and keep the treats from sticking
- Measuring cups and spoons – for precise amounts to keep colors consistent
If you don’t have a silicone spatula, a wooden spoon works, but be prepared for a bit messier cleanup. For shaping and cutting, I find using parchment paper to press the treats down helps keep things neat and easy to slice.
Preparation Method
- Prepare your pan: Line your 9×13-inch baking pan with parchment paper or grease it lightly with non-stick spray. This step saves you from a sticky clean-up later. (5 minutes)
- Melt the butter: In a large saucepan over low heat, melt 6 tablespoons (85 grams) of unsalted butter slowly. Be patient—rushing with high heat scorches the butter and marshmallows, and that’s no fun. (3-4 minutes)
- Add marshmallows and vanilla: Add 10 ounces (280 grams) of mini marshmallows to the melted butter. Stir gently but continuously with your silicone spatula until fully melted and smooth. Stir in 1 teaspoon of vanilla extract for extra flavor. (5 minutes)
- Divide the marshmallow mixture: Remove the pan from heat. Divide the melted marshmallow mixture evenly into three separate mixing bowls while still warm. This makes coloring easier before adding cereal. (2 minutes)
- Add colors: To one bowl, add red gel food coloring a drop at a time, stirring gently until you get the desired deep red shade. Repeat with blue gel food coloring in the second bowl. Leave the third bowl white (no coloring). (3 minutes)
- Mix in the cereal: Working quickly, add 2 cups (50 grams) of Rice Krispies cereal to each bowl. Fold gently but thoroughly to coat the cereal without crushing it. The texture should remain crispy, not soggy. (4-5 minutes)
- Layer the treats: Starting with the red mixture, press it evenly into the bottom of your prepared pan. Use a parchment-lined spatula to press firmly but not too hard—you want a compact but light texture. Repeat with the white mixture in the middle layer, then finish with the blue mixture on top. (10 minutes)
- Cool and set: Let the layered treats cool at room temperature for about 45 minutes to 1 hour until firm. You can speed this up slightly by placing the pan in the fridge, but I find that room temp keeps the texture just right. (45-60 minutes)
- Slice and serve: Once set, use a sharp knife to cut into squares or rectangles. For cleaner cuts, warm the knife blade under hot water and dry it before slicing. (5 minutes)
Be mindful not to over-press the layers as it can make the treats too dense. The visual impact comes from the distinct layers, so keep them neat but light. The vanilla in the marshmallow mix really shines through once the treats cool, lending a cozy aroma that fills your kitchen.
Cooking Tips & Techniques
Honestly, making layered Rice Krispie treats can be a bit fiddly if you don’t have a game plan, but here’s what I’ve learned over time:
- Use gel food coloring: Liquid dyes tend to thin the marshmallow mixture and dull the colors. Gel colors keep the mixture thick and vibrant, which is key for those bright red and blue layers.
- Work fast but gently: Marshmallows set quickly once they start cooling. Mixing the cereal in quick batches and pressing the layers immediately keeps the colors from bleeding into each other.
- Pat, don’t press: When layering, gently pat the cereal mix down instead of pressing hard. This helps keep the treats light and chewy instead of brick-like.
- Warm knife for slicing: The treats can be sticky, so warming your knife in hot water and drying it before each cut helps get clean edges without tearing the layers.
- Batch size matters: Dividing the marshmallow mixture into three bowls before adding colors keeps each batch manageable and prevents the colors from mixing.
I once tried mixing all colors in one bowl and then layering, which was a sticky disaster. Separating the marshmallow mixture first was a game changer. Also, don’t skip the vanilla—it sneaks in a subtle flavor depth that makes these treats taste homemade, not just sugary.
Variations & Adaptations
You can tweak this recipe in several ways to fit different needs or flavor preferences:
- Dietary swaps: Use gluten-free crispy rice cereal to make this gluten-free. Vegan butter and marshmallows are easy swaps for a plant-based version.
- Flavor twists: Add a teaspoon of almond extract in place of vanilla for a nutty depth, or fold in mini white chocolate chips into the white layer for a surprise texture.
- Seasonal versions: For a summer berry twist, mix freeze-dried strawberries or blueberries into the red and blue layers instead of food coloring for a natural flavor boost.
- Cooking method: Instead of stovetop, melt butter and marshmallows in the microwave in 30-second bursts, stirring between, to save time.
- Personal tried variation: I once made a version with a s’mores twist—adding crushed graham crackers in the white layer and mini chocolate chips in the blue layer—which was a fun crowd favorite for a backyard fire pit evening.
Serving & Storage Suggestions
These treats are best served at room temperature, where the layers have settled but are still chewy and soft. They look fantastic arranged on a platter with fresh berries or alongside a cool lemonade for a classic summer vibe.
If you’re hosting a party, these colorful treats pair well with light finger foods, like the crispy prosciutto-wrapped asparagus bites or a refreshing drink like the refreshing champagne punch. The sweet and salty combos balance nicely.
For storage, wrap the treats tightly in plastic wrap or store in an airtight container at room temperature for up to 3 days. They can also be refrigerated for up to a week but may get a bit firmer—just bring them back to room temp before serving. Freezing is possible for up to 2 months; thaw overnight in the fridge and then let sit at room temperature to soften.
Interestingly, the flavors seem to mellow and meld if you let them rest a day, making them even more enjoyable. Just be careful when stacking as the colors can transfer slightly if wrapped too tightly.
Nutritional Information & Benefits
Each serving of these Red White and Blue Rice Krispie Treats (about a 2×2 inch square) contains roughly:
| Nutrient | Amount |
|---|---|
| Calories | 150-170 kcal |
| Carbohydrates | 30 g |
| Sugars | 15-18 g |
| Fat | 4-5 g |
| Protein | 1-2 g |
While these treats are a sugary indulgence, the use of real butter and the option to add natural fruit powders make them a slightly more wholesome choice than some other colorful party sweets. They’re naturally gluten-free if you use gluten-free cereal and can be adapted for vegan diets, too.
For those watching allergens, keep in mind marshmallows usually contain gelatin, which is animal-derived. The recipe does contain dairy from butter, but there are easy substitutes as noted earlier. I find that balancing indulgence with simple, quality ingredients helps keep this snack feeling special but not overdone.
Conclusion
These Festive Flavorful Red White and Blue Rice Krispie Treats are a simple way to bring a bit of classic fun and color to your summer gatherings. They’re easy enough to make on a whim but special enough to feel like you put some thought into the celebration. What stuck with me about this recipe is how it brings people together—kids and adults alike—without fuss or fancy ingredients.
Feel free to customize the colors or add your own flavor twists to make these treats truly yours. I’ve enjoyed seeing how friends have adapted the layers or mixed in different textures, turning this humble recipe into something personal and festive every time.
So, if you’re looking for a no-fail, crowd-pleasing dessert that carries the spirit of summer and the Fourth of July in every bite, this recipe will quietly do the job. And hey, if you try it, I’d love to hear how you made it your own—because that’s the best part of any favorite recipe.
Frequently Asked Questions
Can I use regular-sized marshmallows instead of mini marshmallows?
Yes, you can use regular marshmallows. Just chop them into smaller pieces to help them melt evenly and quickly.
Is there a way to make these treats less sticky?
Lightly dust your hands or spatula with powdered sugar or non-stick spray when pressing the mixture into the pan to reduce stickiness.
Can I make these treats ahead of time?
Absolutely. They store well at room temperature for a few days and can be frozen for longer storage. Just thaw before serving.
What if I don’t have gel food coloring?
Liquid food coloring will work but can thin out the marshmallow mixture and dull the colors. Use sparingly and add more color to compensate.
How do I keep the layers from mixing colors?
Make sure to work quickly when layering and gently pat each layer without pressing too hard. Let each layer set slightly before adding the next if you want extra separation.
Pin This Recipe!
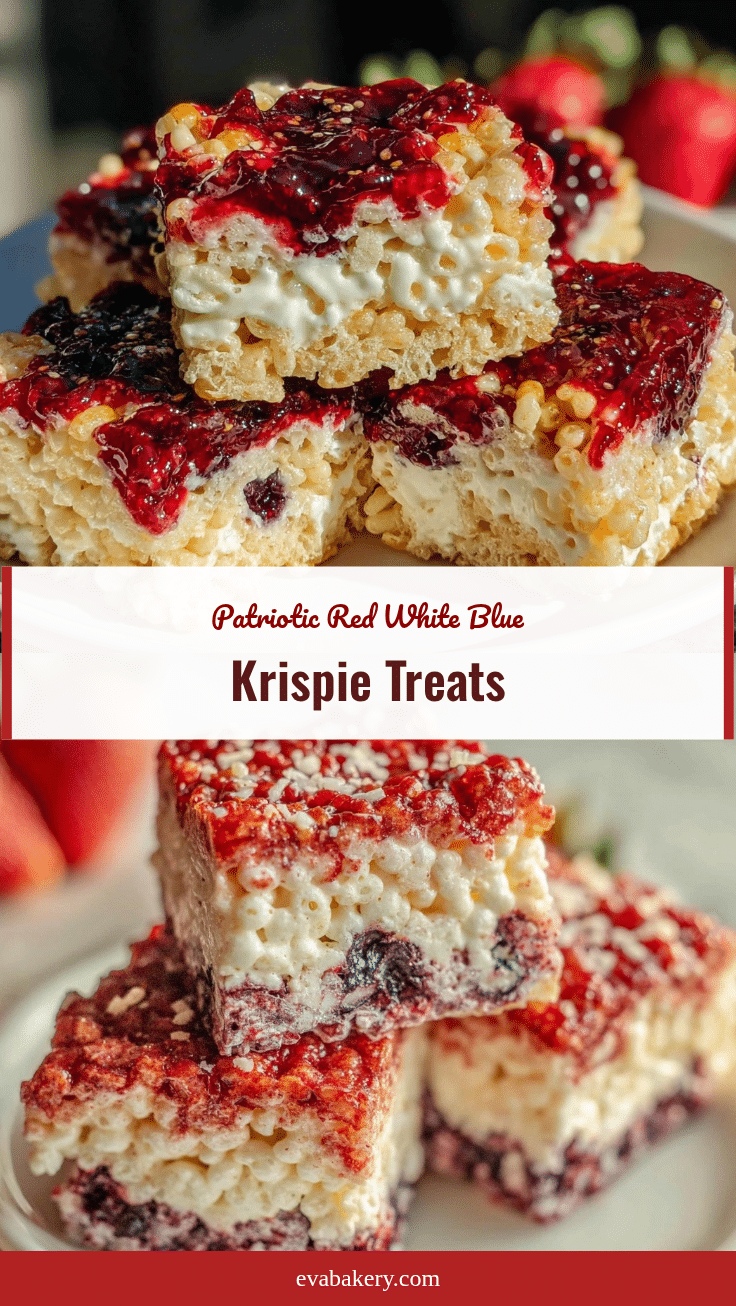
Red White and Blue Rice Krispie Treats Easy Festive 4th July Recipe
A simple, colorful, and festive Rice Krispie treat recipe perfect for Fourth of July celebrations, featuring distinct red, white, and blue layers with a nostalgic crispy-chewy texture.
- Prep Time: 15 minutes
- Cook Time: 5 minutes
- Total Time: 1 hour 20 minutes
- Yield: 12 servings 1x
- Category: Dessert
- Cuisine: American
Ingredients
- 6 tablespoons (85 grams) unsalted butter
- 10 ounces (280 grams) mini marshmallows
- 6 cups (150 grams) Rice Krispies cereal
- 1 teaspoon vanilla extract
- Red gel food coloring
- Blue gel food coloring
- 1 tablespoon powdered sugar (optional)
Instructions
- Line a 9×13-inch baking pan with parchment paper or grease it lightly with non-stick spray.
- In a large saucepan over low heat, melt 6 tablespoons (85 grams) of unsalted butter slowly.
- Add 10 ounces (280 grams) of mini marshmallows to the melted butter. Stir gently but continuously until fully melted and smooth.
- Stir in 1 teaspoon of vanilla extract.
- Remove the pan from heat and divide the melted marshmallow mixture evenly into three separate mixing bowls while still warm.
- Add red gel food coloring drop by drop to one bowl until desired deep red shade is reached.
- Add blue gel food coloring drop by drop to the second bowl until desired blue shade is reached.
- Leave the third bowl white (no coloring).
- Add 2 cups (50 grams) of Rice Krispies cereal to each bowl and fold gently but thoroughly to coat the cereal without crushing it.
- Starting with the red mixture, press it evenly into the bottom of the prepared pan using a parchment-lined spatula.
- Repeat with the white mixture in the middle layer, then finish with the blue mixture on top.
- Let the layered treats cool at room temperature for about 45 minutes to 1 hour until firm.
- Once set, use a sharp knife warmed under hot water and dried to cut into squares or rectangles.
Notes
Use gel food coloring for vibrant colors without thinning the marshmallow mixture. Work quickly when layering to prevent colors from bleeding. Gently pat layers instead of pressing hard to keep treats light and chewy. Warm knife before slicing for clean cuts. Optional powdered sugar helps reduce stickiness when shaping. Can substitute gluten-free cereal and vegan butter/marshmallows for dietary needs.
Nutrition
- Serving Size: About a 2x2 inch squ
- Calories: 160
- Sugar: 16.5
- Sodium: 90
- Fat: 4.5
- Saturated Fat: 3
- Carbohydrates: 30
- Protein: 1.5
Keywords: Rice Krispie treats, Fourth of July, patriotic dessert, red white and blue, easy dessert, summer treats, festive snacks


